Select the “Map Options...“ item from the “Maps“ menu. This will display the “Line Options” dialog box.
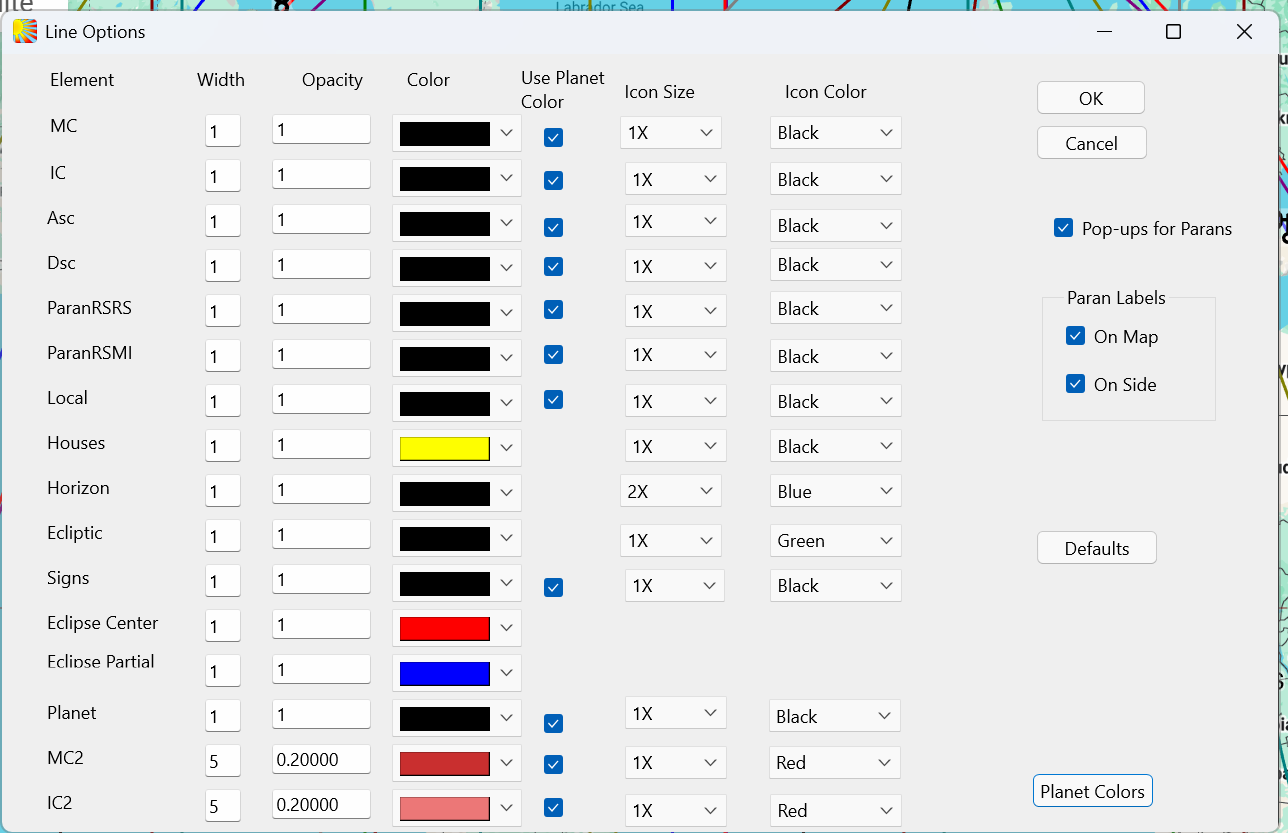
This powerful screen controls how the lines and glyphs appear on the map. It has been carefully designed to enable the maximum amount of detail to appear clearly, with a minimum of overlapping. Bear this in mind before making changes.
From the left, Column 1 lists the various lines, Column 2, each’s width, Column 3, its Opacity.
Column 4 may be shown black by default, but note column 5, which allows you to indicate you wish to use the Planet Color. To do this click the Planet Color button at bottom right of the screen, which will take you to Chart\Point Colors.
Column 6 enables you to set the icon size. Beware of collision and overlap if these are increased.
Column 7 sets the icon color.
Pop-ups for Parans and their labels are controlled by the labels on the right.